Home     About Me     Features     Fave Places to Party!
Crafting      Home Improvement & Decor     Digital Scrapping     Reading
Showing posts with label Food Edition. Show all posts

Tuesday, February 25, 2014

DIY Food Edition: Apple Ginger Sparkler


Here is another of the recipes I'll be posting from my sister-in-law's baby shower!  This is a great SUPER easy non-alcoholic party drink.
Apple Ginger Sparkler
adapted from Martha Stewart

2 2 L bottles of club soda
2 apple juice concentrates (frozen section)
1 1/2 C ginger syrup

Let the apple concentrate thaw, then mix all three ingredients together.  Makes a little over a gallon and a half.

Friday, February 21, 2014

DIY Food Edition: Crepe Bites


Okay, ladies and gents, here's the first of the recipes I promised from the baby shower I threw.  More coming!
Crepe Bites

Crepes
1 C flour
1/4 tsp baking powder
1 tsp salt
1 1/4 C milk
1 egg
1 Tbsp melted butter

Fruit
Blackberries
Strawberries, hulled and halved
Kiwi, skin removed, quartered and then halved

Nutella

Bamboo skewers, cut in half (I used my Cutco kitchen shears)

Mix together the ingredients for the crepes.  Warm a pan to medium heat and lightly grease it, then put in about a 1/4 cup, moving the pan around to evenly coat.  Cook for about 30 to 45 seconds on medium heat, until you can see that the edges are cooked, then flip and cook for another 30 to 35 seconds.

While crepes are still warm, use a silicone spatula to spread the Nutella over the crepe in an even layer.  Not too thick, or it will ooze out, but not so thin that you won't be able to taste it!  Then roll them up and slice into 1 to 1 1/2 inch sections.

Take your skewers and slide the pointy end through a piece of kiwi, then a piece of crepe, a blackberry, another piece of crepe and then finish it off with a strawberry half.  And there you have it!  A delicious elegant deconstructed crepe.  Enjoy!


Linking up here:
{M} Twigg Studios-Skip to My Lou-The DIY Showoff-Mad in Crafts-Marvelously Messy-Making the World Cuter-Sew Can DoC.R.A.F.T.- Keeping It Simple-Creating My Way to Success-All Things Fee-Craft-o-Maniac-Boogieboard Cottage-Between Naps on the Porch-I Should Be Mopping the Floor-Momnivore's Dilemma-The Girl Creative {T} Yesterday on Tuesday-Tip Junkie-Sugar Bee Crafts-Funky Polkadot Giraffe-Hope Studios-My Uncommon Slice of Suburbia-Home Stories A2Z-Primitive and Proper {furniture only}-Elizabeth & Co.-Coastal Charm-Ladybug Blessings-Homework-New Nostalgia {W} Simply Designing-Someday Crafts-Creations by Kara -Sew Much Ado-My Girlish Whims-Savvy Southern Style-Seven Thirty Three-Polkadots on Parade-Ginger Snap Crafts-DIY by Design {Th} Cherished Bliss-The Brambleberry Cottage-Beyond the Picket Fence-A Glimpse Inside-Domestically Speaking {paint only}-A Creative Princess-My Repurposed Life {F} Today's Creative Blog-Thirty Handmade Days-Romantic Home-Remodelaholic-Shabby Nest-Lovely Crafty Home-WhipperBerry-At the Picket Fence-Finding Fabulous-delicate CONSTRUCTION-Naptime Crafters-Chic on a Shoestring Budget Decorating-Fingerprints on the Fridge-504 Main-French Country Cottage-Truly Lovely-Miss Mustard Seed {furniture only}-Simply Sweet Home-Craftionary-One Artsy Mama-Lil' Luna-The 36th Avenue {S} Reasons to Skip the Housework-Funky Junk Interior

Monday, August 5, 2013

DIY Food Edition: Dried Fruit


I grew up on homemade dried fruit.  I honestly didn't even know for years that you could buy it!  And as I have purchased some since then, I can say I wasn't missing much.  Store bought dried fruit is typically icky and very often has sugar and preservatives added to it.  You know those de-lish-ous dried mangoes from Costco? That are so yummy they are like dessert?  That's because they ARE dessert!  In one serving size, there is 32 grams of sugar.  That's more than that of a Twinkie, folks.
Now, dried fruit that you make yourself is actually good for you!  Because it's being dried, not cooked, none of the nutrients are degraded, so you're getting the full bang of the good stuff.
I bought a dehydrator a number of years ago.  (This is the one.It has served me well for the past 5 years, and it was what I could afford at the time, so I don't regret buying it, despite the fact that it is dying now...it turns on and off randomly....)  (And now I have an uber-expensive commercial grade dehydrator from Cabela's on my covet list...)  That's what my mom used, so that's what I wanted to use.  It is the more energy efficient method of indoor drying, but you can just use your oven if you're not drying often.
So here we go.  In this case, I am making mangoes, bananas and plums.
Step 1: Prep the fruit.  Obviously, this step kinda depends on what you're using.  Mangoes and bananas, obviously you'll want to remove the skin.  Other fruits like pears, apples, plums, peaches, etc., I personally never bother removing the skin.  My mum didn't either.  Too much extra work, and we don't want to lose that extra fiber, right?  :P
In the case of the mangoes, I picked up this nifty mango slicer, and it works like a charm.
Then I sliced the mango halves and peeled the skin off each slice.
If your bananas are a little far gone, try slicing them right through the skin, and then peeling the skin off the individual slices.  It takes a little longer, but then you don't squish your overly ripe banana while slicing it.
The plums, as mentioned, I don't peel.  Just wash them thoroughly, and then slice into thin (about a quarter inch) slices.  Thinner your slices are, faster they will dry.  And I just prefer them that way.  Up to you.  But overall, remember to keep the slices of each batch uniform or else some pieces may not get dry enough.
When I dry apples (and sometimes with pears too), I drop them into a bowl with some lemon juice and stir it around to coat.  This prevents them from turning an ucky brown during the long drying process.
Step 2: Load them up.
I just stick 'em on my dehydrator trays, making sure none of the pieces are touching.  If you're going the oven route, line your trays/cookie sheets with parchment paper or silpat and lay your fruit out in a single layer, again, not touching.  You might even try placing a cookie rack on your tray and putting the fruit on that.  More air circulation and thus faster to dry.
Step 3: Dry 'em!  I flip on my dehydrator.  Ovens: heat it up to around 150 degrees.  You want to dry it, not cook it.  This will take several hours (say 4 to 8...how's like for a vague window!).  Fruit is done if it is chewy.  A great way to test this is to rip a piece in half and take a look.  If any beads of moisture form, it's not done.
I personally over-dry mine by typical standards.  I like just a little crunch.
Step 4:  Let it sit.  Typically 12 hours is the recommendation.
Step 5: Pack it up in storage containers or bags.
And there you are!  A snack you can actually feel good about, healthy and tasty!

Monday, July 22, 2013

DIY Food Edition: Baby Food


In an attempt to un-process our food as much as possible, I'm going the DIY route with a lot of things I'd otherwise just purchase.  Baby food was one of those things with my first baby.  I started making my own with my second baby.  And now that I'm onto my third baby, it's no big deal to whip up small or big batches of homemade baby food!
So here's the basics.  Puree fruit.  Serve.  Or cook vegetables.  Puree.  Serve.  :)  But just for kicks, here's a photo step by step for ya of a veggie batch.

My tools:
A big pot
An immersion blender (here's mine, for example)
Silicon ice cube trays (these little gems can also be found at Walmart if you're lucky) or old baby food jars or little baby food storage containers

The goods:
2 large sweet potatoes
5-6 medium carrots

Step 1: Peel the sweet potatoes (I don't peel the carrots, just scrub them really well with a veggie brush), and chop both sweet potatoes and carrots into small chunks (mine were about a half inch by half inch by inch rectangles of sweet potato).  Smaller they are, faster they cook.

Step 2:  Plop 'em in a big pot.
Step 3: Cover with enough water for them to cook in.
Step 4: Bring to a boil, turn down to medium low and let 'em cook until tender.  Check with a fork, if it pierces easily, they are done.
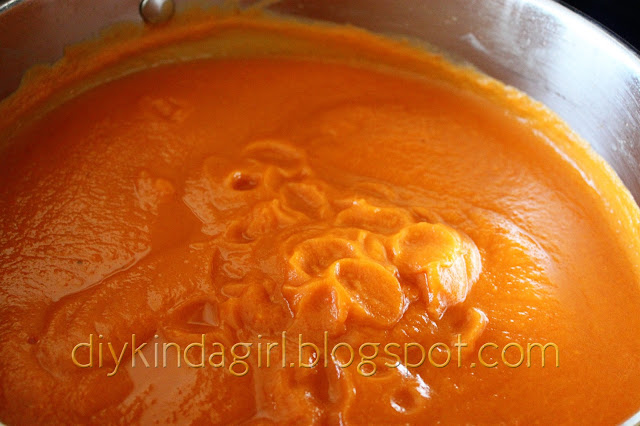
Step 5: Puree with immersion blender.  Or you could just as easily throw it all into a regular blender and puree.  You may need to add water, but be cautious, you don't want it to be TOO watery and thin.  How thoroughly you puree depends, of course, on the age of your baby.  We're still in the silky smooth puree stage.
Step 6: Put into storage, whether that be old baby food jars, special little baby food storage containers, or in my case, silicon ice cube trays.  I adore these, they are easy to use and then you have perfect little 4 ounce cubes of baby food.  After you fill those trays, tap it on the counter to settle the food.
Don't fill any of these containers all the way, as the baby food will expand as it freezes.  (And no, the glass baby jars will not break if you don't fill them up all the way, I used those for my second baby's food, and nary a one broke.)

Step 7: Freeze.
No, freezing will not cause dramatic color change.  These are prunes.  Forgot to take a photo of the sweet potato/carrot cubes before I popped 'em out.
Step 8: If you are using the silicon ice cube trays, pop those babies out and put them in a freezer ziploc or for  longer storage when I make a big batch, I seal 'em up with my Food Saver.
Step 9: Thaw (I pop mine in the microwave, 1 minute for one cube, a minute thirty for two cubes) and serve to a darling baby who will undoubtedly make a big mess with it.
She makes prunes look good.
This particular batch made about 26 4 ounce cubes of baby food.  (Stage 1 jars are typically 2.5 ounces, Stage 2 jars are typically 3.5 to 4 ounces, Stage 3 jars are typically 6 ounces.)
I spent less than $2 (I don't know exactly how much, unfortunately, but I guarantee it was less than 2 bucks since I got the carrots on sale!), so that's less than 8 cents a serving.  Gerber Stage 2 from walmart.com is $0.54 per 3.5 ounce serving.  Savings?  Check.  Knowing precisely what is in your baby food?  Check.
Easy Peasy!
Related Posts Plugin for WordPress, Blogger...